Hardware & Wiring Overview
Complete electrical system architecture and wiring guidelines for the Fabrica cloth folding robot
Step-by-step wiring demonstration for all electronics connections
System Architecture
The Fabrica electronics system consists of 4 main components:
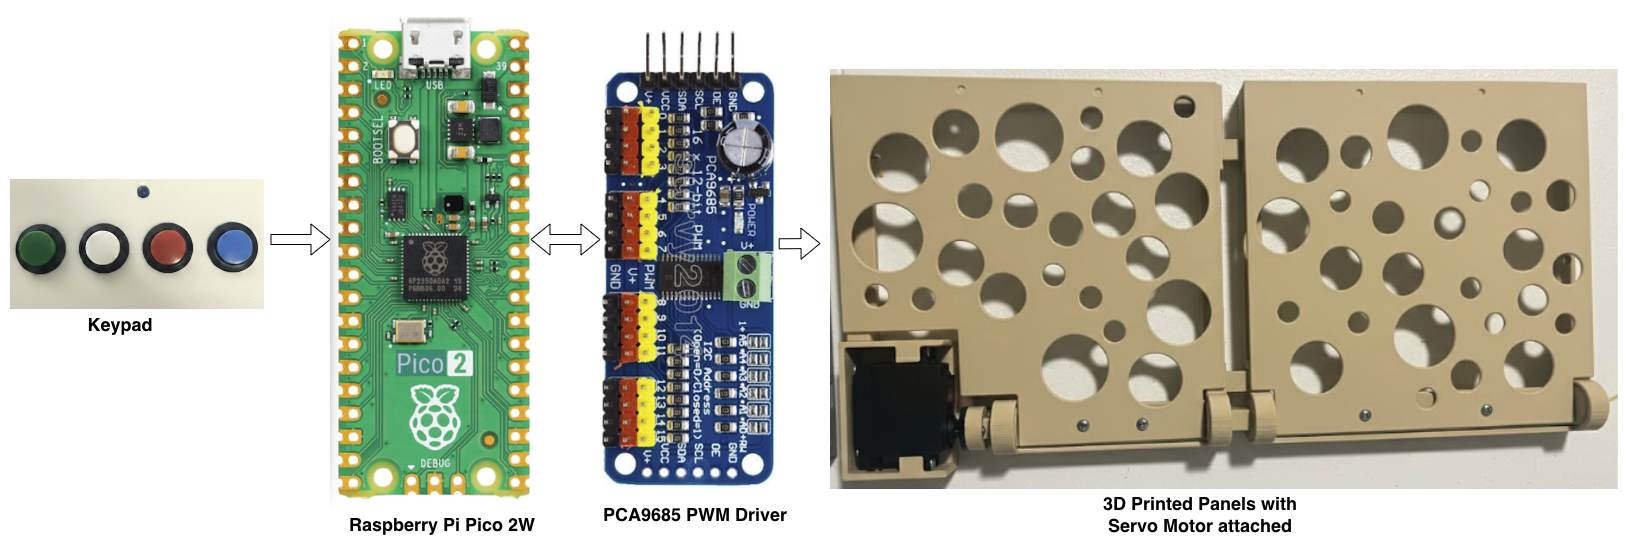
1. Raspberry Pi Pico 2W
Brain of the system. Runs MicroPython code, processes button inputs, controls LED, and communicates with servo controller via I2C.
2. PCA9685 Servo Controller
16-channel, 12-bit PWM driver. Receives position commands from Pico via I2C and generates precise PWM signals for 16 servos simultaneously, which can in turn drive 16 motorized modules.
3. Power Supply (5-6V)
Provides high-current power to servos (3-5A recommended). Pico is powered separately via USB or shared power rail.
4. User Interface
4 control buttons and 1 Status LED for mode selection and feedback.
Wiring Diagram
Full wiring diagram — Raspberry Pi Pico 2W → PCA9685 → Servos, with power distribution and user interface connections.
What You Need
Electronics
- ✓Raspberry Pi Pico 2W
- ✓PCA9685 16-channel PWM driver board
- ✓MG996R or equivalent servos (up to 16)
- ✓5V / 5A regulated DC power supply
- ✓4× momentary push buttons
- ✓1× LED (any colour) + 220Ω–330Ω resistor
- ✓Dupont jumper wires (male-to-female)
- ✓USB-A to Micro-USB cable (for Pico)
Tools & Software
- →Multimeter (for continuity / voltage checks)
- →Soldering iron + solder (optional, for permanent joints)
- →Wire stripper / snips
- →Thonny IDE or mpremote (MicroPython REPL)
- →Small flathead screwdriver (for terminal blocks)
⚠️ Before You Start — Safety
- • Always disconnect power before making or changing any wiring.
- • Never exceed 6V on the servo power rail — it will damage servos.
- • Double-check polarity before powering on (Red = +, Black = −).
- • Common ground is essential — Pico, PCA9685 and power supply must share GND.
- • USB power alone is insufficient — servos need a dedicated supply.
- • Add a 3-5A fuse on the servo power rail to protect against shorts.